How to Build a Home Cockpit: A Step-by-Step Guide
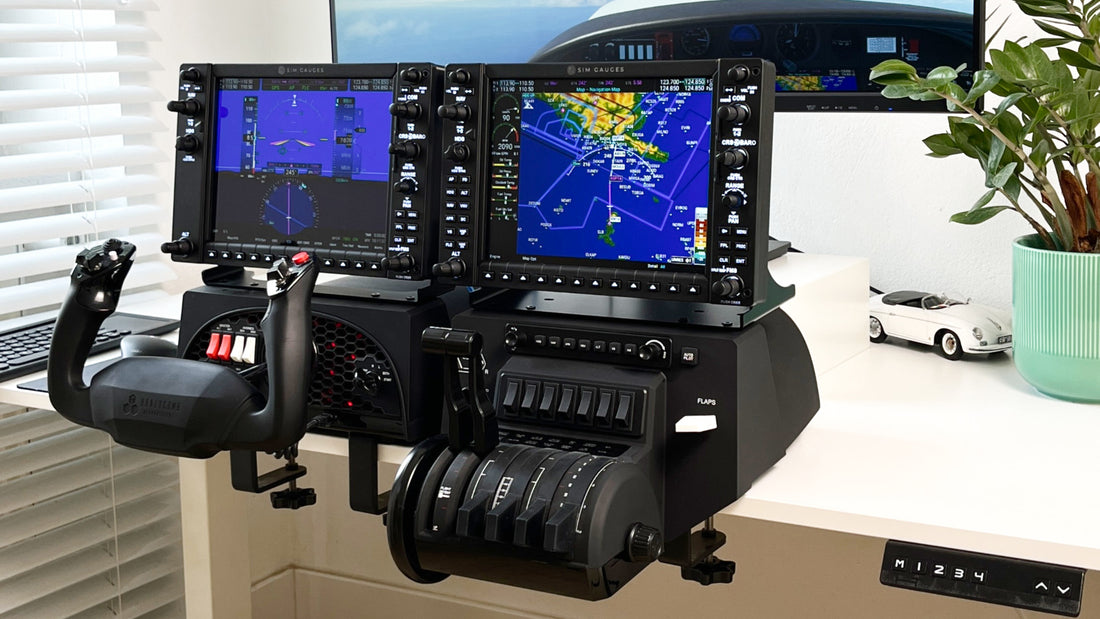
Creating your own home cockpit can take your flight simulation experience to the next level. Using products from Honeycomb Aeronautical and SimGauges, you can build a realistic and functional setup right on your desk. In this guide, we'll walk you through the process of building a home cockpit with Honeycomb Alpha and Bravo controls, SimGauges G1000 with an audio panel, and rudder pedals. Let's get started!
What do you need to build a home cockpit?
- Honeycomb Alpha Flight Controls (Yoke)
- Honeycomb Bravo Throttle Quadrant
- SimGauges G1000 Suite with Audio Panel
- Rudder Pedals (e.g., Saitek)
- A desktop computer with Windows 10 or 11, meeting MSFS 2020 or X-Plane requirements
- A large main monitor (minimum 32 inches)
- A desk with enough space for all components
Step 1: Set up your desk
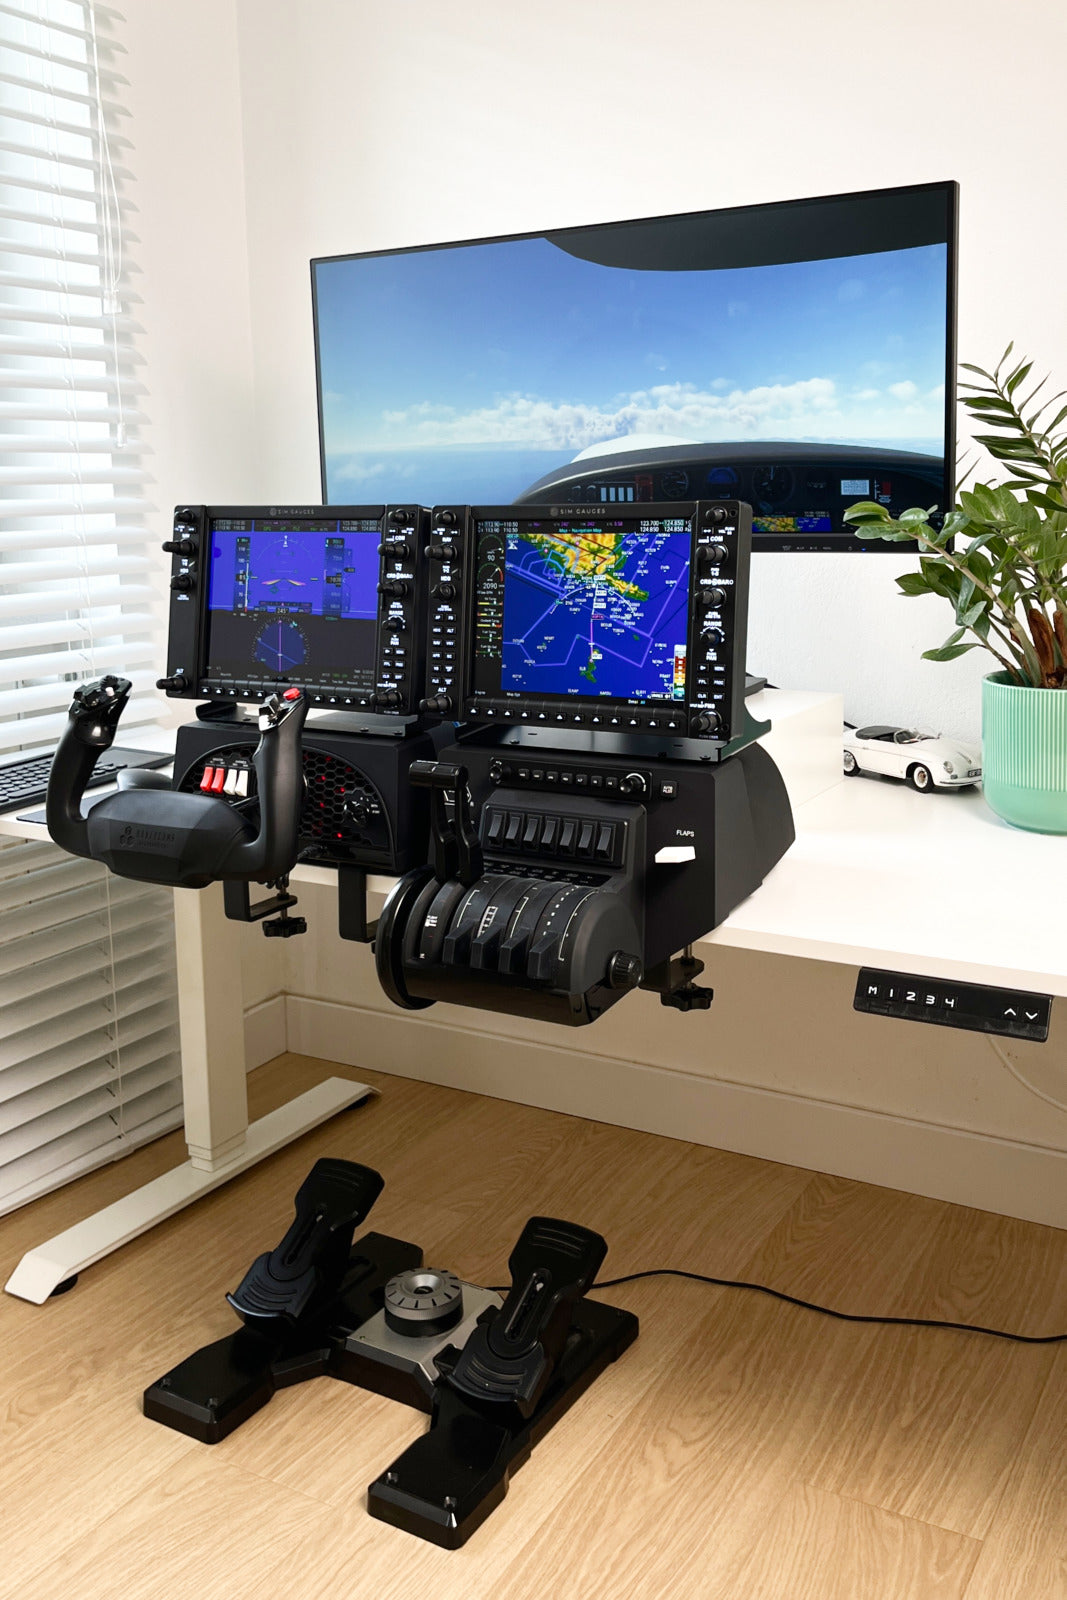
First, make sure your desk has enough space to fit all your components comfortably. Place your large main monitor in the centre of the desk. This will be your primary display for the external view and instrument panel.
Step 2: Install the Honeycomb Alpha Yoke
- Unbox the Alpha Yoke: Take out the Honeycomb Alpha yoke from its box.
- Mount the Yoke: Attach the yoke to your desk using the included mounting brackets. Make sure it's secure and positioned comfortably.
- Connect to PC: Plug the USB cable from the yoke into your computer.
Step 3: Install the Honeycomb Bravo Throttle Quadrant
- Unbox the Bravo Throttle: Take out the Honeycomb Bravo throttle quadrant from its packaging.
- Mount the Throttle: Attach the throttle quadrant to your desk next to the yoke. Use the mounting brackets to ensure it's secure.
- Connect to PC: Plug the USB cable from the throttle quadrant into your computer.

Step 4: Set Up the SimGauges G1000 Suite
- Unbox the G1000 Suite: Carefully unbox the SimGauges G1000 components, including the PFD, MFD, and audio panel.
- Mount the G1000: Using the included mounting brackets, attach the G1000 components to the Honeycomb Alpha and Bravo units according to the instructions in the setup video below. Make sure everything is securely mounted and properly aligned.
- Connect the G1000: Connect the G1000 components to your computer using the provided cables. Follow the instructions in the SimGauges manual for proper setup.
Step 5: Install rudder pedals
- Unbox the Rudder Pedals: Take out the rudder pedals (e.g., Saitek) from their packaging.
- Place the Pedals: Position the rudder pedals under your desk, on the floor, where you can comfortably reach them with your feet.
- Connect to PC: Plug the USB cable from the rudder pedals into your computer.
Step 6: Configure your flight simulator software
- Install the Connection App for SimGauges G1000: Ensure you have installed the necessary connection app for the SimGauges G1000 suite. Detailed instructions on how to do this can be found at the following link: SimGauges FAQ.
- Launch Flight Simulator: Launch your flight simulation software (Microsoft Flight Simulator or X-Plane).
- Calibrate Controls: Go to the settings menu and calibrate the Alpha yoke, Bravo throttle quadrant, and rudder pedals.
- Move Virtual Windows: Drag the virtual windows for the G1000 displays from your flight simulator onto the physical screens on the SimGauges G1000.
Step 7: Test your setup
- Run a Test Flight: Start a test flight in your flight simulator. Check that all controls and instruments are working correctly.
- Adjust Settings: Make any necessary adjustments to the positioning of the controls or the settings in the software to ensure everything is functioning smoothly
Summary
Building a home cockpit using Honeycomb Alpha and Bravo controls, SimGauges G1000 suite, and rudder pedals is a fantastic way to enhance your flight simulation experience. With a large main monitor and a properly set up desk, you can create an immersive and realistic environment right in your home. Follow these steps, and you'll be ready to take to the virtual skies in no time. Happy flying!
I hope that the above article was useful. If you will have any further questions or requests please do not hesitate to contact us.
![]() Blue sky!
Blue sky!
Sim Gauges Team.
![]()